Follow Me On Social Media!

Introduction
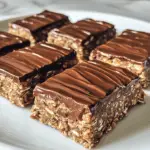
No-Bake Chocolate Oat Bars are the perfect answer for those times when you want a sweet, satisfying treat without the hassle of baking. These bars combine chewy oats with creamy peanut butter and a layer of smooth, melted chocolate, creating a deliciously indulgent snack that’s both easy and nutritious. With just a few basic ingredients and no oven required, these no-bake bars are quick to make and great for meal prep. Whether you’re packing a lunchbox treat, need an afternoon pick-me-up, or want a post-dinner dessert, these bars are versatile and easily customizable. Best of all, they can be adapted to suit your preferences, from adding coconut and nuts to experimenting with different types of chocolate. Let’s gather the ingredients and get started!
Ingredients Needed
To make No-Bake Chocolate Oat Bars, you’ll need a few pantry staples:
Main Ingredients:
- Rolled Oats (2 cups): Use old-fashioned rolled oats for a chewy texture; quick oats will also work, but the texture may be softer.
- Peanut Butter (1 cup): Creamy or chunky peanut butter adds flavor and helps bind the bars. Substitute with almond or sunflower seed butter for a nut-free option.
- Honey or Maple Syrup (½ cup): Acts as a natural sweetener and binding agent. Choose maple syrup for a vegan-friendly option.
- Chocolate Chips (1 cup): Semi-sweet or dark chocolate chips are ideal for the topping layer. Milk or white chocolate can also be used for a different flavor profile.
- Vanilla Extract (1 tsp): Adds a hint of warmth and enhances the overall flavor.
- Salt (¼ tsp): Balances the sweetness and enhances the peanut butter flavor.
Optional Add-ins:
- Shredded Coconut: Adds a tropical hint and texture.
- Chopped Nuts: Almonds, walnuts, or pecans add crunch and extra nutrition.
- Chia Seeds or Flax Seeds: Boosts fiber and nutrition.
- Sea Salt Flakes: Sprinkle on top of the chocolate layer for a gourmet touch.
With these ingredients, you’re ready to make a batch of delicious, chewy No-Bake Chocolate Oat Bars that are perfect for snacking or dessert.
Step-by-Step Cooking Instructions
Follow these steps to make No-Bake Chocolate Oat Bars:
Prepare the Oat Mixture
- In a large mixing bowl, combine 2 cups of rolled oats, 1 cup of peanut butter, and ½ cup of honey or maple syrup. Mix well until all the ingredients are evenly combined and the oats are fully coated. Add 1 tsp of vanilla extract and ¼ tsp of salt, and stir again.
Add Optional Mix-Ins
- If you’d like to add any extras, now is the time! Stir in ¼ cup of shredded coconut, chopped nuts, or chia seeds to add extra flavor and texture.
Press the Mixture into the Pan
- Line an 8×8-inch baking pan with parchment paper, allowing a little extra paper to hang over the sides for easy removal. Transfer the oat mixture into the pan and press it down firmly and evenly with a spatula or the back of a spoon. Make sure the mixture is packed tightly to help the bars hold together.
Melt the Chocolate Layer
- In a microwave-safe bowl, add 1 cup of chocolate chips. Microwave in 20-30 second intervals, stirring between each interval until the chocolate is fully melted and smooth. Be careful not to overheat the chocolate, as it can burn easily.
Pour and Spread the Chocolate Layer
- Pour the melted chocolate over the oat mixture in the pan. Use a spatula to spread the chocolate evenly, covering the entire surface. For an extra touch, sprinkle sea salt flakes over the chocolate for a delicious sweet-salty flavor.
Chill and Set
- Place the pan in the refrigerator and chill for at least 2 hours or until the bars are firm and the chocolate has fully set.
Cut and Serve
- Once the bars are firm, use the parchment paper to lift them out of the pan. Place on a cutting board and slice into squares or bars. Enjoy your No-Bake Chocolate Oat Bars right away, or store them for later!
Storage Tip: Store the bars in an airtight container in the refrigerator for up to 1 week or freeze them for longer storage.
Customization Ideas
No-Bake Chocolate Oat Bars are incredibly versatile, and you can easily customize them to suit your taste. Here are some ideas to make these bars uniquely yours:
1. Change the Nut Butter
- Swap out the peanut butter for almond butter, cashew butter, or sunflower seed butter for a different flavor. Each type of nut or seed butter brings a unique taste, and sunflower seed butter is a great nut-free option.
2. Add Dried Fruit
- Mix in dried cranberries, raisins, or chopped dates for a touch of natural sweetness and chewiness. Dried cherries or apricots also add a burst of flavor and a hint of tartness.
3. Experiment with Chocolate
- Use dark chocolate for a more intense flavor, or go for milk chocolate if you prefer a sweeter, creamier finish. You could also swirl in white chocolate chips for a fun contrast.
4. Boost the Nutrition
- Add a tablespoon of chia seeds, flax seeds, or hemp seeds to increase fiber and protein content. You could even mix in protein powder to turn these bars into a more filling snack for active days.
5. Try Different Sweeteners
- Replace honey or maple syrup with agave nectar or brown rice syrup if you’re looking for different sweetness profiles or a vegan-friendly option.
6. Play with the Texture
- For an added crunch, mix in chopped nuts like almonds, walnuts, or pecans. Toasted coconut flakes also add a deliciously nutty flavor and a bit of extra chew.
These customization options let you make No-Bake Chocolate Oat Bars your own, creating a delicious snack tailored to your preferences and dietary needs.
Tips for Perfect No-Bake Bars
Making No-Bake Chocolate Oat Bars is simple, but these tips will help ensure they turn out perfectly every time:
1. Press the Mixture Firmly
- For bars that hold together well, make sure to press the oat mixture firmly into the pan. Use the back of a spoon or a spatula to compact the mixture, or place a piece of parchment paper on top and press down firmly with your hands. Packing the mixture tightly helps the bars stay intact after cutting.
2. Use Parchment Paper
- Lining the pan with parchment paper makes it much easier to lift out the entire block of bars once they’re set. This helps achieve clean cuts and prevents sticking.
3. Be Patient with Chilling
- Allow the bars to chill in the refrigerator for at least 2 hours or until the chocolate layer is fully set. Cutting them too soon can cause the bars to crumble or the chocolate to smudge.
4. Storing for Freshness
- Store the bars in an airtight container in the refrigerator to keep them firm and fresh for up to 1 week. They can also be frozen for up to 3 months; simply thaw in the fridge before eating.
5. Adjust Consistency if Needed
- If the oat mixture feels too dry, add a bit more honey or maple syrup. If it’s too sticky, add a few extra oats until you reach the right consistency.
These tips will help you create perfectly chewy and delicious No-Bake Chocolate Oat Bars every time.
Serving Suggestions
No-Bake Chocolate Oat Bars are incredibly versatile and can be enjoyed in many ways. Here are a few ideas for serving and enjoying these delicious treats:
1. Chilled or Room Temperature
- These bars taste great chilled, straight from the fridge, with a firm texture and refreshing flavor. If you prefer a softer bite, let them sit at room temperature for a few minutes before eating.
2. Pair with Beverages
- Enjoy these bars with a glass of cold milk or a warm cup of coffee or tea for a balanced treat. The combination of chocolate and peanut butter pairs beautifully with both hot and cold drinks.
3. Snack or Dessert
- Cut the bars into larger pieces for a satisfying snack, or slice them into smaller squares for a quick, bite-sized treat. These make great additions to lunchboxes or a healthy dessert option.
4. On-the-Go Fuel
- Wrap individual bars in parchment paper for an easy, grab-and-go snack. Perfect for road trips, hiking, or a post-workout boost!
These serving suggestions will make your No-Bake Chocolate Oat Bars even more enjoyable, whether you’re at home or on the go.
Frequently Asked Questions (FAQ)
1. Can I make these bars nut-free?
Yes, No-Bake Chocolate Oat Bars can easily be made nut-free! Simply substitute the peanut butter with sunflower seed butter or soy nut butter for a similar creamy texture and taste. Make sure to use nut-free chocolate chips if needed.
2. How long do these bars stay fresh?
Stored in an airtight container in the refrigerator, these bars will stay fresh for up to 1 week. You can also freeze them for longer storage—up to 3 months. Just thaw in the fridge or at room temperature before enjoying.
3. Can I freeze no-bake chocolate oat bars?
Absolutely! To freeze, place the cut bars in a single layer on a baking sheet and freeze for about an hour. Once frozen, transfer them to a freezer-safe container or bag with parchment paper between layers. Thaw in the refrigerator or at room temperature when you’re ready to eat.
4. Can I substitute the oats?
If you prefer, you can use quick oats instead of rolled oats, though the texture will be slightly softer. For a gluten-free version, make sure to use certified gluten-free oats.
These FAQs should help you customize, store, and enjoy your No-Bake Chocolate Oat Bars with confidence!


